Sunday Paper Dinner Table: Blueberry Rhubarb Jam
The Sunday Paper Dinner Table: We here at The Sunday Paper believe in the power of meaningful conversations around the table as a foundation in building a more caring, kinder and compassionate world. We want to inspire you and encourage you to gather virtually at your tables, open your hearts, and open your minds each and every week with the help of our Meaningful Conversation Starter and suggested recipe. Then report back to us and tell us about the experience. Cheers!
Meaningful Conversation Starter
How do you feel about our country right now?
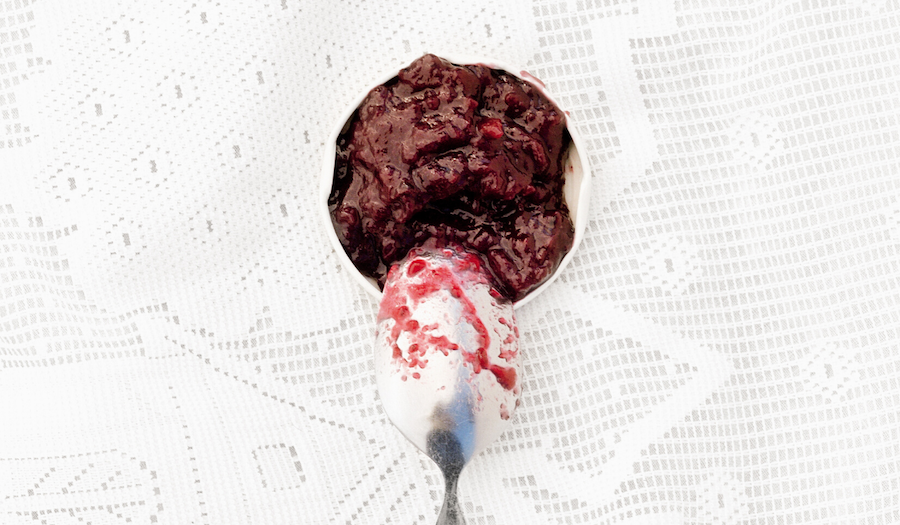
Blueberry-rhubarb is the first berry jam that we made at Sqirl after marmalade season, a riff on a Southern classic. An iconic jam for me because it’s what Sqirl’s all about—taking a classic and turning it on its head.
Ingredients
- 1,000 g (2 lb 3 oz) rhubarb
- 1,000 g (2 lb 3 oz) blueberries
- 1,200 g (6 cups) sugar (60% of the weight of blueberries plus rhubarb)
- 40 g (2 Tbsp plus 2 tsp) lemon juice (2% of the weight of blueberries plus rhubarb)
Directions:
- Prepare your plate test by putting a few saucers in the freezer.
- Cut the rhubarb into 1⁄4-inch (6 mm) slices; they should all be about the same size for even cooking. Set aside.
- Put the blueberries in a blender and puree until smooth: Start with a little bit of the blueberries and blend on low speed as you add the rest of the berries and increase the speed.
- If you have more or less than 2,000 g rhubarb and blueberries (we use 50% rhubarb and 50% blueberries), you can figure out how much sugar and lemon juice you will need by using the following formula:
- Grams of rhubarb plus blueberries × 0.60 = grams of sugar
- Grams of rhubarb plus blueberries × 0.02 = grams of lemon juice
- Combine the blueberry puree, rhubarb, sugar, and lemon juice in a jamming pot. Cook the mixture over high heat, stirring frequently. When the rhubarb is softened, about 14 minutes, reduce the heat to low. Use a potato masher or wooden spoon to smash it; you’re going to be stirring a lot because the fruit needs to disintegrate, release liquid, and eventually melt into the blueberry puree. (It won’t fully break down—it’s okay to have some chunks.)
- Turn the heat back up to high and cook for 4 minutes, stirring. Use a spider or fine-mesh skimmer to skim off any scum. Dip the spider into a bowl of water and shake off any excess to clean between skims.
- Reduce the heat to low, then smash the rhubarb again with a potato masher for a minute. Turn the heat back up to high and continue to cook, stirring and skimming as necessary, for another couple of minutes, until the jam is thickened, the texture is homogenous, and the temperature reaches 213°F (101°C), about 25 minutes total. Perform a plate test.
- Spoon a little of the jam onto a frozen saucer. Put the plate back in the freezer for 1 minute, then slide a finger through the jam. It’s done when it parts and you see a strip of clean saucer. If it isn’t set, return the pot to the heat, stir constantly, and test again after 1 to 2 minutes.
The Sqirl Jam Book Step-By-Step Canning
Pgs. 16-21
The Sqirl Way of canning—using lug-lid jars and putting them into the oven—allows us to process a lot of jam at once. It’s canning in a professional setting, where it’s done very quickly with the help of more than one person, and isn’t necessarily the best option for home cooks. Water-bath canning is the most widely used method for home jammers. We outline both methods here. There is also the option of not canning at all: Transfer your jam to any jar or covered container and keep it in the refrigerator for anywhere from a few weeks to months, depending on the jam (you’ll know to toss it when you see mold).
Canning tools:
- Sharpie
- Bowl filled with water and paper towels
- Ladle
- Blue tape
- Jars
- Lids
- Saucepan
- Pitcher
- Heat-resistant gloves
- Kitchen towels
- Headspace tool
- Magnet tool
- Funnel
- Timer
- Baking sheet
Stovetop Method: Water Bath Canning
- Heat your jars before you start making jam. Prepare a water bath (such as from a canning kit) fitted with a rack on the stove. Place the jars in sideways so that they fill with water before setting them right-side up. Meanwhile, put the lids in a 2-quart pot of water over low heat.
- Using tongs, remove the jars from the water bath, by first lifting straight up and then turning the jar sideways, pouring the water out of each jar into the pot. Set the jars on clean towels.
- After you make your jam, ladle it into a heatproof pitcher.
- Pour the jam into each jar, using a funnel, leaving 1⁄4 inch of space in each jar. (If you’ve overfilled, spoon some into the next jar. If you have any leftover jam that won’t fill a full jar, store it in the refrigerator and use for up to several weeks.)
- Wipe the rims with paper towels.
- Use the magnet tool to remove the lids from their pot of water and place them on the jars. Holding the lid on the sides to keep it in place on the jar, remove the magnet tool.
- Take the rings from a bowl and screw them on, not too tight and not too loose, so that there is a little space for air to shift.
- Using the tongs, put the jars back into the water bath, right-side up (straight down), and bring it to a boil.
- Set a timer for 10 minutes; once the timer goes off, turn off the heat and set the timer for another 10 minutes.
- Using the tongs, grab the jars from the top (there’s a ridge near the top of the jar) and lift them straight up from the water to towels on the counter. Let them sit undisturbed overnight. You should hear them pop as they seal. In the morning you’ll know whether they sealed properly. If a jar doesn’t seal, put it in the fridge; it will keep for up to several weeks.
- Label the jars with the name of the jam and date. These will keep in a cool, dry place for about 2 years.
*For more information about water bath canning, refer to the USDA’s Complete Guide to Home Canning, which is available online.
Oven Method: Lug-lid Canning
- Sterilize your jars before you start making jam: Heat the oven to 225°F (107°C). Put the lids in a bowl and set aside. Put the jars on a baking sheet and put them in the oven while you’re preparing your jam (or for at least 15 minutes). Remove the sheet tray from the oven only when you are ready to can. (Keep the oven on at 225°F [107°C].)
- Ladle the hot cooked jam into a heatproof pitcher.
- Pour the jam into the prepared jars, using a funnel if you’d like, leaving 1⁄4 inch of space in each jar. Work quickly so that the jam doesn’t cool down too much. (If you’ve overfilled, spoon some into the next jar. If you have any leftover jam that won’t fill a full jar, store it in the refrigerator and use for up to several weeks.)
- Use paper towels to wipe the rims of the jars clean. We’re using our bare hands because we work fast. But the jars are hot! Wear gloves if you can’t handle the heat.
- Wearing gloves (I use latex-coated gardening gloves), put the lids on the jars. I like to turn to the left first and then to the right, until the lid feels locked, like you can’t turn it anymore—but not too tight, or the lid will strip and won’t lock—you’ll get a feel for
I highly suggest “going too far” with a lid, so you know what going too far feels like! (The work goes by that much faster if you have help—one person to fill and clean the jars, the other person to put on the lids.) - Flip the jars upside-down onto your baking sheet. Once you’ve filled all of the jars, keep them upside- down for 2 to 3 minutes. Then flip them again so they’re right-side up on the baking sheet.
- Put the baking sheet of jars in the oven for about 25 minutes. You want the interior of the jam to be 185°F (85°C). One of your jars will have to be a martyr; open it up, put your thermometer in it, and if it isn’t 185°F (85°C), return the jars to the oven. Use the martyr to retest.
- Remove the jars from the oven. Let them sit out overnight and check the seals in the morning. If a seal has popped, put the jar in the refrigerator; it will keep for up to several weeks. Label the jars with the name of the jam and date. These will keep in your pantry for about 15 months.
*This is how we can at Sqirl. It isn’t necessarily ideal for home cooks. It’s important to check that the jam has reached 185°F (85°C). The jars must be sealed tightly so as not to let in air. If you do use lug lids, get the ones with the button.
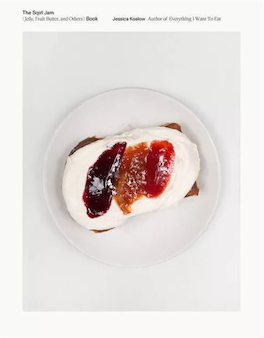
From “The Sqirl Jam Book (Jelly, Fruit Butter, and Others)” by Jessica Koslow. Click here to purchase.
This recipe was featured in the July 5th edition of The Sunday Paper. The Sunday Paper inspires hearts and minds to rise above the noise. To get The Sunday Paper delivered to your inbox each Sunday morning for free, click here to subscribe.